Week 5: 3D Scanning and Printing
Assignment:
- Test the design rules for your printer(s) (group project)
- Design and 3D print an object (small, few cm) that could not be made subtractively
- 3D scan an object (and optionally print it)
For this week the goal was learn how to scan and print in 3D, try different printers and scanners and see the difference among them.
Machines:
3D Printers: MakerBot Replicator and Mbot Grid II+
Software:
3D print: MakerBot Print and MPrint
Materials:
3D scan: white matte spray
3D print: PLA (Polylactic Acid)
TEST THE DESIGN RULES
For this assignment I downloaded a Thingiverse file to test the different parameters of the 3D printer. I used the Mbot Grid II+ to do the comparision pirnting in PLA.
The first sample I printed was in LOW resolution with the following parameters:
- Infill density: 0,10
- Layer Height: 0,30 mm
- Number of shells: 2
- Printing time: 21 min
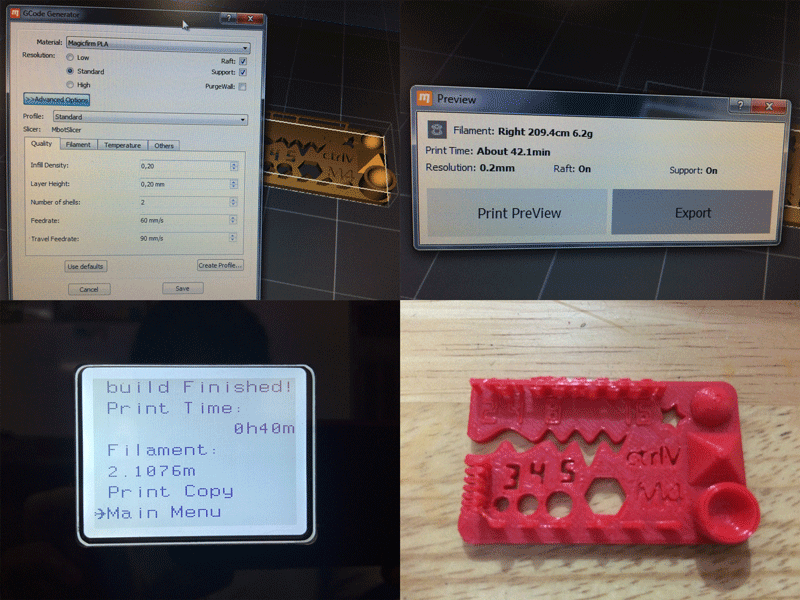
The second sample I printed was in STANDARD resolution with the following parameters:
- Infill density: 0,20
- Layer Height: 0,20 mm
- Number of shells: 2
- Printing time: 40 min
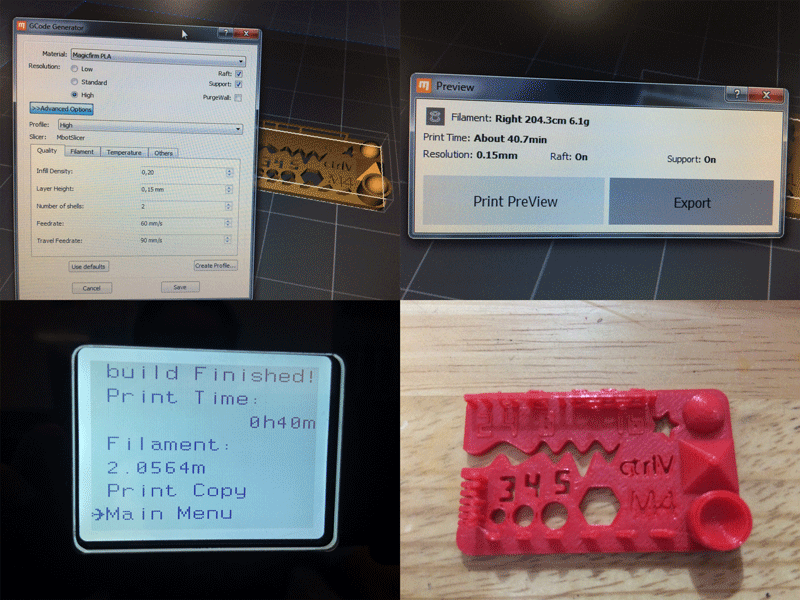
The third sample I printed was in HIGH resolution with the following parameters:
- Infill density: 0,20
- Layer Height: 0,15 mm
- Number of shells: 2
- Printing time: 40 min
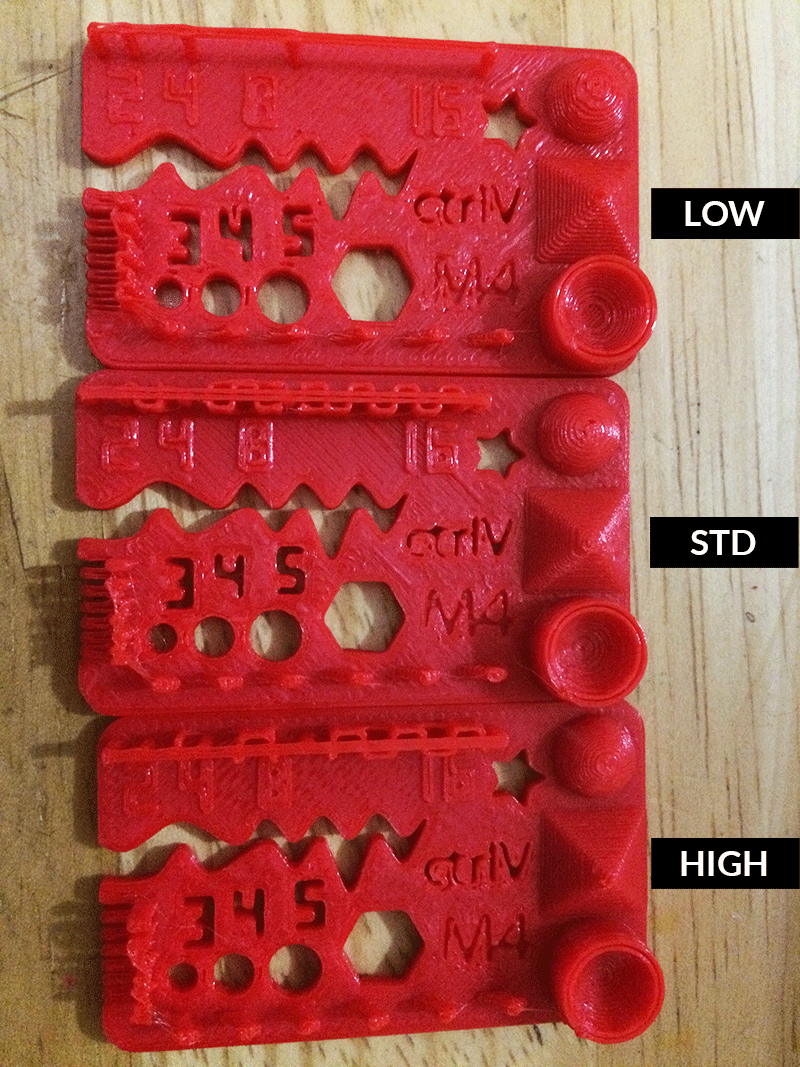
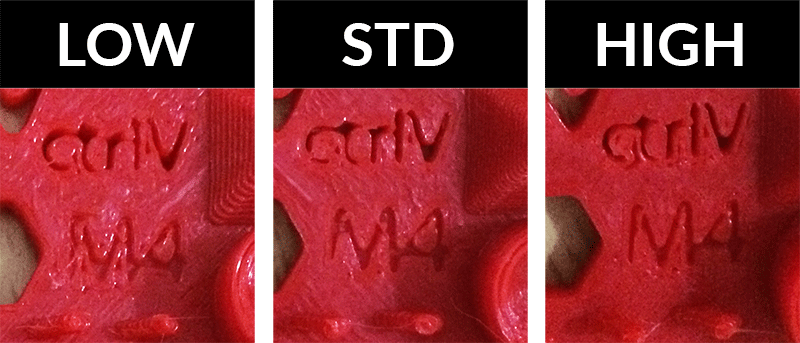
This is the comparision of the three samples and the results showed that as thin layer hight as better printout results, but there is not significant difference between STANDARD and HIGH samples and the printing time is almost the same, at least in this 3D printer model.
3D SCAN AN OBJECT
I scan myself using Sense 3D Systems Scanner which process is capture an image with an integrated camera and sensing the distance by a laser.
First I setted the scanner on Person>Full Body, then I sat on a rotary chair in front of the scanner and turned slowly arround with one of my fellow students help. That was enough for the scanner to capture all the information to generate a virtual 3D model of me. Once we checked that all was alright, we post-processed the information: Solidify the mesh and trim the unnecessary surfaces. Finally we exported into a STL file and now is ready to print.
For printing the previous myself scan file, I used a MakerBot Replicator 3D printer. The steps to print are the following:
-
Convert the OBJ file into STL to be able to insert it in MakerBot Print
-
Insert the STL file and scale it to 50 mm height (Z axis)
-
When I crop the model in SENSE it was not straight, so I had to orient to X plane, otherwise when printing, the MakerBot will print supports between the model and the printer plate.
-
Export the file using 0.2 mm resolution, 10% infill and number of shells 2.
-
When the export is done, you can see the estimated time and material to use in the printing process.
-
Save the exported file in a USB drive and plug it in the MakerBot, select the file to print and as soon as the printer reaches the right temperature, it will start printing.
- Done!
HIGH PRECISION 3D SCANNING
We did this assignment in group using an Aicon 3D Systems Scanner. This scanner operates by the triangulation of two cameras’s images, of different patterns of light beams projected on the surface of the object.
In this case, first we needed to get the room darker, because this scanner has its own light projector to catch only the information of the object we want to scan. When we start the software we have to create a project and decide what kind of scan process we are going to use:
- Contour scan, that take part of the same object as reference to merge the next scan.
- Index points reference, that take circular sticker that we put on the object as reference to merge the next scan.
Then we need to calibrate in the software the amount of light that the cameras are capturing, and when this is done we “take a picture”. For the following scans we need to move the object to a new are, respecting the parameters of references that we have chosen earlier, and repeat the last step. If we respect the references the software merge itself the surface. And finally we can export an STL file, but in this case, the solidify process is made in an external software.
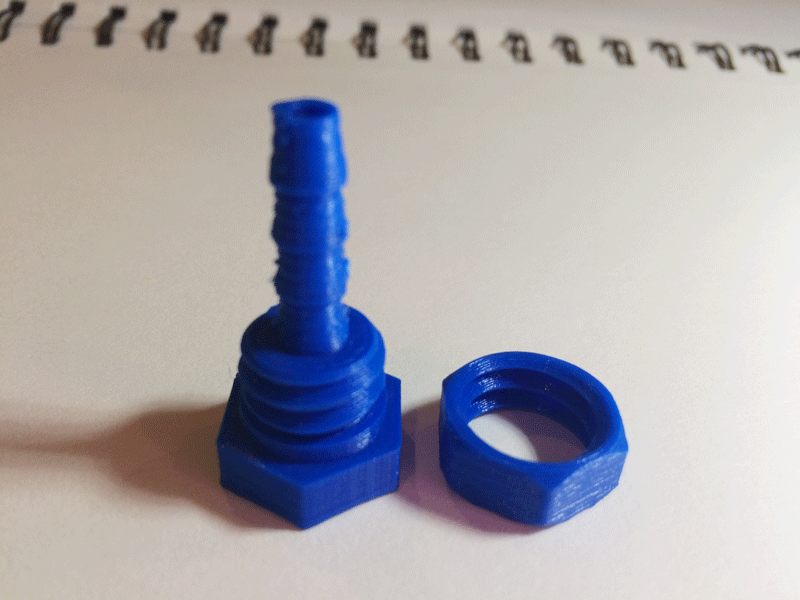
DESIGN AND 3D PRINT AN OBJECT
For the printing assignment I used Fused deposition modeling (FDM) technolgoy. I designed a hose connector I will use in my final project, the nut is the one I designed in week 2.

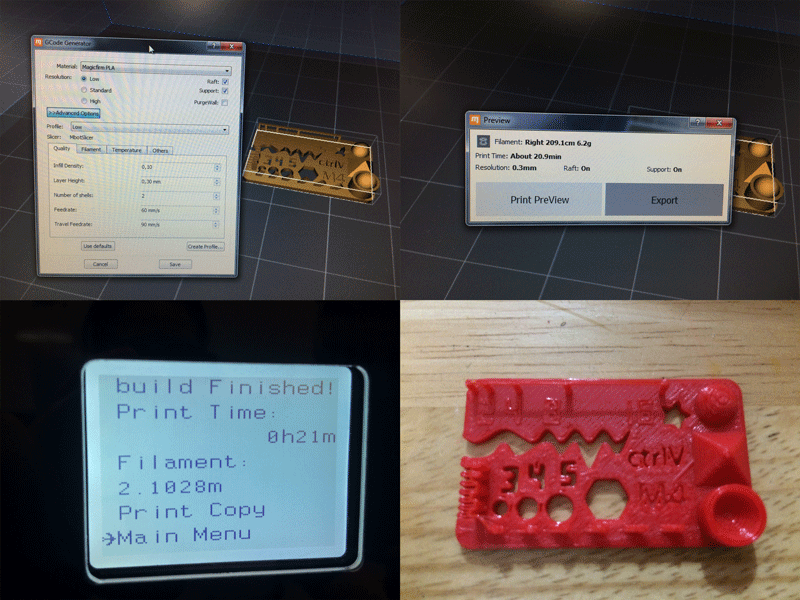
I try with a Mbot Grid II+ using PLA material. To print I had to follow this steps:
- Save the file in STL format.
- Import the file in MPrint to be able to save it as X3G which is the format file that Mbot reads the GCode to print.
- Resize the model if needed.
- Set the printing resolution to 0.2 mm layer height, infill density 0,10 and number of shells 2
- Generate de GCode and when it finishes shows the estimated filament and printing time.
- Save the X3G file in the SD Card and insert it in the printer.
- In Print menu search for the file in the list and push the button to start. Once the printer reaches the necessary temperature, it starts to print.
- At the end you can see in the printers display the printing time and the used material.